MidKnight Snacks: green velvet cupcakes
Topped with cream cheese frosting and green sprinkles
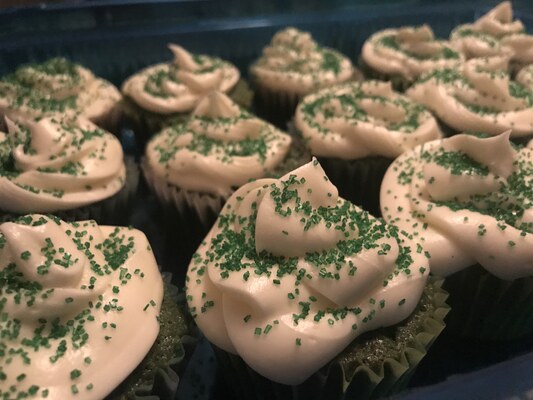
Photo Sarai Cochran
The finished green velvet cupcakes, with cream cheese frosting and sprinkles.
March 24, 2021
With the month of green (March) slowly coming to an end, I made green velvet cupcakes for the first time ever for St. Patrick’s Day, inspired by this recipe from Pinterest. With not a lot of baking skills whatsoever, this recipe was pretty easy and delicious. I really like how the author includes details like how long the cupcakes last and how to make her frosting taste the best.
Ingredients
For the cake:
- 2 1/2 cups all-purpose flour
- 2 cups sugar
- 1 tbsp. cocoa powder
- 1 tsp. salt
- 1 tsp. baking soda
- 2 eggs
- 1 cup oil
- 1 cup buttermilk
- 1 tbsp. vinegar
- 1 tsp. vanilla
- Green food coloring
For the frosting:
- 1 package of softened cream cheese
- 1/4 cup softened butter
- 1 tsp. vanilla extract
- 1 bag powdered sugar (a two pound bag works best)
- Milk as needed
Instructions
For the cupcakes:
-
Preheat your oven to 350° and grease your cake pans or muffin pans, whatever your using to make this recipe.
-
Whisk your eggs in a medium bowl. Add in remaining liquid ingredients. Whisk until combined, then stir in the food coloring until you reach your desired shade.
-
Mix dry ingredients in a separate bowl.
-
Combine wet and dry ingredients, mixing until well-combined.
-
Pour the batter into cake or cupcake pans. If you are making cupcakes, I recommend using an ice cream scooper to make sure batter is evenly distributed.
-
Baking times will vary based on what you are using. For one 8″ cake pan, it takes about 22 minutes. Regular-sized cupcakes take around 16 minutes and mini cupcakes about 13 minutes.
For the frosting:
- Cream together cream cheese, butter and vanilla in a bowl.
- Gradually mix in powdered sugar until smooth.
- Add in milk as needed to reach consistency of your choice.
- Frost the cupcakes (you can chill leftover frosting in the fridge).
I had so much leftover batter and frosting that I used it to make a cake. I also used a sandwich bag for the frosting and it took me a few cupcakes to get the hang of it overall. After I added the frosting to the top of the cupcakes, I put them in the refrigerator for a bit and I think they tasted better that way. I didn’t use the full bottle of food coloring because I didn’t want them to be too dark but I think I will next time, just to try it out.
I’d definitely make these again. Even after making these successfully the first time, I know what to do next time to make them better. My family and friends loved it and I highly recommend this recipe, whether for personal use or just for a fun night with family.